
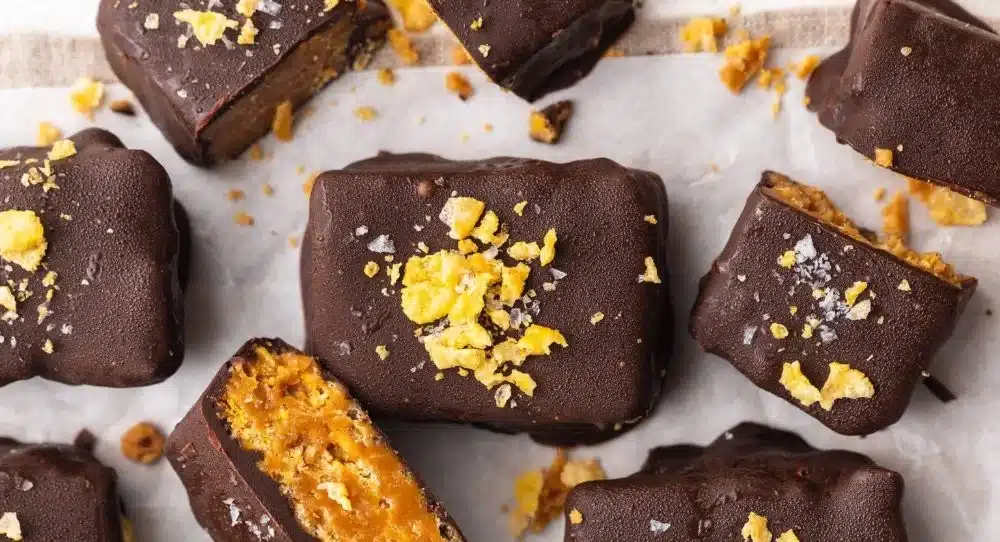
How to make Healthy Homemade Butterfingers
Making your own Healthy Homemade Butterfingers is a fun and rewarding experience. This recipe allows you to enjoy a classic favorite while ensuring that it is nutritious. Let’s dive into the ingredients and simple steps to create this delightful treat.
Ingredients:
- 1 cup peanut butter
- 1/3 cup maple syrup or honey
- 2 cups corn flakes
- 1 cup chocolate chips
- 2 teaspoons coconut oil
Directions:
-
Crush the Corn Flakes: Start by adding the corn flakes to a large zip-top bag. Seal the bag tightly and use a rolling pin or your hands to crush the cereal into small pieces. You want them to be broken down but not completely powdered.
-
Mix Peanut Butter and Sweetener: In a large bowl, add the peanut butter and your choice of sweetener (maple syrup or honey). Stir these together using a spoon or spatula until they are fully combined and smooth.
-
Combine Mixtures: Once the peanut butter mixture is ready, add the crushed corn flakes into the bowl. Mix everything thoroughly until the corn flakes are evenly coated with the peanut butter mixture.
-
Transfer to Loaf Pan: Line a loaf pan with parchment paper for easy removal. Pour the mixture into the pan and use your hands or the back of a spoon to press it down evenly, creating a solid layer.
-
Freeze to Set: Place the pan in the freezer and let it harden for at least 1 hour. This helps the mixture firm up, making it easier to cut into bars later.
-
Cut into Bars: Once hardened, remove the pan from the freezer. Carefully lift the mixture out using the parchment paper and place it on a cutting board. Cut the firm mixture into 12 bars of your preferred size.
-
Melt the Chocolate: In a microwave-safe bowl, combine the chocolate chips and coconut oil. Microwave in 30-second intervals, stirring between each interval until the chocolate is fully melted and smooth.
-
Dip the Bars: Take each bar and dip it into the melted chocolate, ensuring it is completely coated. Shake off any excess chocolate and place the coated bar onto a parchment-lined plate.
-
Final Freeze: Once all bars are coated, place them back into the freezer for about 10 minutes or until the chocolate has set. After that, they are ready to enjoy!
-
Store for Later: These bars can be enjoyed straight away or stored in an airtight container in the freezer for up to 3 months, allowing you to savor them at your convenience.
Why You’ll Love This Healthy Homemade Butterfingers
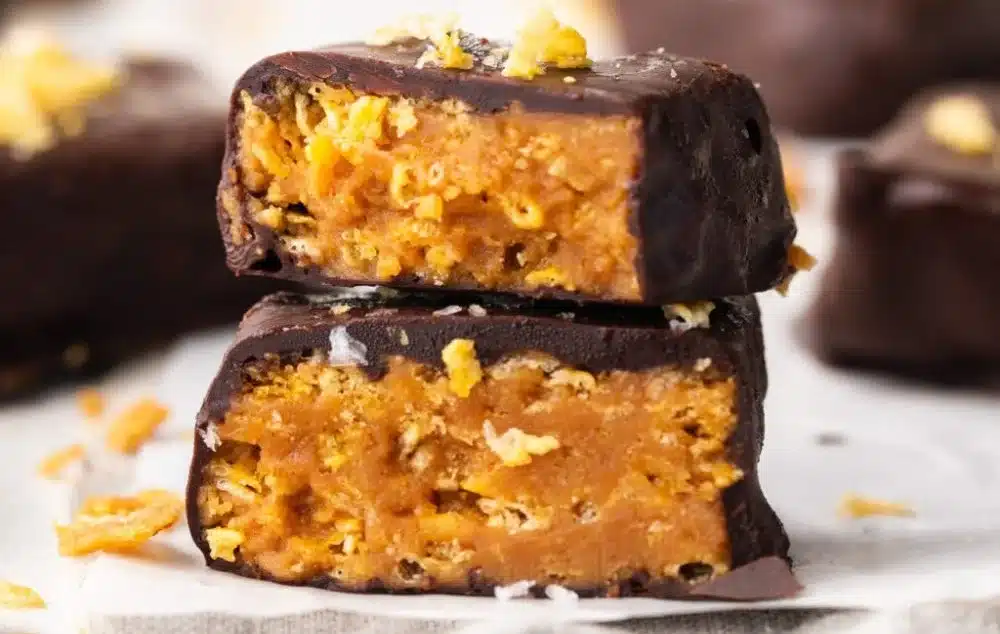
These Healthy Homemade Butterfingers offer a rich blend of flavors and textures. The crunchy corn flakes combined with the creamy peanut butter create a delightful treat that satisfies any sweet tooth without the guilt. Plus, you know exactly what ingredients you are consuming.
Nutritional Benefits
- Peanut Butter: A great source of protein and healthy fats, which can help reduce hunger and cravings.
- Maple Syrup/Honey: Natural sweeteners that offer some vitamins and minerals compared to refined sugar.
- Corn Flakes: A crunchy element that adds fiber to your diet.
- Dark Chocolate: Rich in antioxidants and can provide heart-healthy benefits when consumed in moderation.
- Coconut Oil: Contains medium-chain fatty acids that can offer quick energy and boost metabolism.
What to Serve With Healthy Homemade Butterfingers
These delicious bars can be served alongside various foods. Consider pairing them with:
- A glass of almond milk or your preferred dairy-free milk
- A bowl of fresh fruit
- A smoothie for a quick breakfast or snack
How to Store Healthy Homemade Butterfingers
To keep your Healthy Homemade Butterfingers fresh, store them in an airtight container in the freezer. This will help maintain their texture and prevent freezer burn. They can last up to 3 months when stored properly. If you want to enjoy them sooner, you can keep them in the refrigerator for a week.
Tips and Mistakes to Avoid
-
Don’t Overheat the Chocolate: When melting the chocolate chips, be cautious not to overheat them, which can lead to burning. Use short intervals and stir often to maintain a smooth consistency.
-
Crushing Corn Flakes: Make sure not to crush the corn flakes into powder. You want some texture to give your Butterfingers that classic crunch.
-
Pressing Firmly: When pressing the mixture into the loaf pan, ensure it’s compact. This will help the bars hold together once cut.
-
Use Parchment Paper: Always line your pan with parchment paper! It makes it easy to lift out the bars and prevents sticking.
Variation
Feel free to experiment with this recipe! Some variations to consider include:
- Add Protein Powder: Mix in a scoop of your favorite protein powder into the peanut butter mix for an added boost.
- Nut Butter Substitute: Substitute the peanut butter with almond or cashew butter for a different flavor.
- Add a Pinch of Sea Salt: Sprinkle some sea salt on top after coating with chocolate for a sweet and salty treat.
FAQs
1. Can I use regular sugar instead of maple syrup or honey?
Yes, you can use regular sugar, but it will lose the nutritional benefits of the natural sweeteners. If you decide to use sugar, adjust the amount to your taste.
2. How long will these bars last?
When stored in an airtight container in the freezer, they can last for up to 3 months. In the refrigerator, they are best enjoyed within a week.
3. Can I use other cereals instead of corn flakes?
Absolutely! Feel free to substitute with your favorite cereals, such as puffed rice or even a granola mix, to create unique flavors and textures.
Enjoy making and sharing your Healthy Homemade Butterfingers! They are a fun snack or dessert that’s both tasty and good for you.
Healthy Homemade Butterfingers
Ingredients
Main Ingredients
- 1 cup peanut butter Creamy or crunchy based on preference
- 1/3 cup maple syrup or honey Choose based on personal preference
- 2 cups corn flakes Crushed into small pieces
- 1 cup chocolate chips Dark chocolate recommended
- 2 teaspoons coconut oil For melting with chocolate
Instructions
Preparation
- Start by adding the corn flakes to a large zip-top bag. Seal the bag tightly and crush the cereal into small pieces.
- In a large bowl, add the peanut butter and your choice of sweetener (maple syrup or honey). Stir until fully combined and smooth.
- Add the crushed corn flakes to the peanut butter mixture and mix thoroughly.
- Line a loaf pan with parchment paper and pour the mixture into the pan, pressing down evenly.
- Place the pan in the freezer and let it harden for at least 1 hour.
Melting Chocolate
- In a microwave-safe bowl, combine the chocolate chips and coconut oil. Microwave in 30-second intervals, stirring until fully melted.
Assembly
- Remove the pan from the freezer and lift the mixture out using the parchment paper. Cut into 12 bars.
- Dip each bar into the melted chocolate, ensuring complete coverage, then place on a parchment-lined plate.
- Place the coated bars back into the freezer for about 10 minutes until the chocolate sets.
Storage
- Store the bars in an airtight container in the freezer for up to 3 months.