
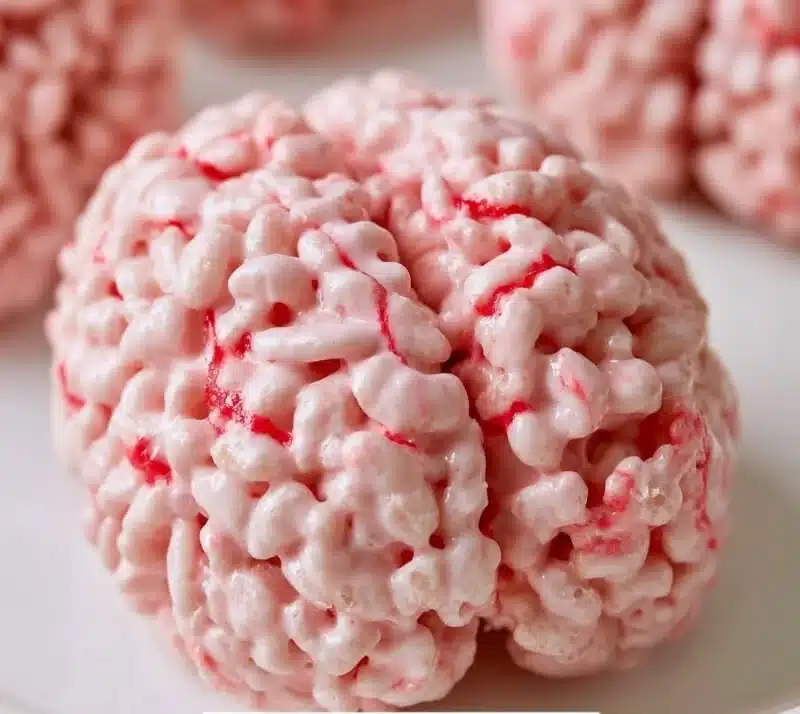
How to make Homemade Marshmallow Brain Rice Krispies
Making homemade marshmallow brain Rice Krispies is a fun and easy treat, perfect for Halloween or any themed party! With a few simple ingredients, you can create a spooky dessert that everyone will love. Here’s how to do it:
Ingredients:
- 3 tablespoons butter
- 1 package (10 oz) marshmallows
- 6 cups Rice Krispies cereal
- Red food coloring
- Chocolate melting wafers (optional for details)
Directions:
- In a large pot, melt the butter over low heat. Make sure to keep stirring so it doesn’t burn.
- Once the butter is melted, add the marshmallows to the pot. Stir until the marshmallows are completely melted and the mixture is smooth.
- Remove the pot from the heat. Add a few drops of red food coloring and stir well until the mixture is evenly colored.
- Quickly add the Rice Krispies cereal to the melted marshmallow mixture. Mix everything together until the cereal is fully coated with the marshmallow mixture.
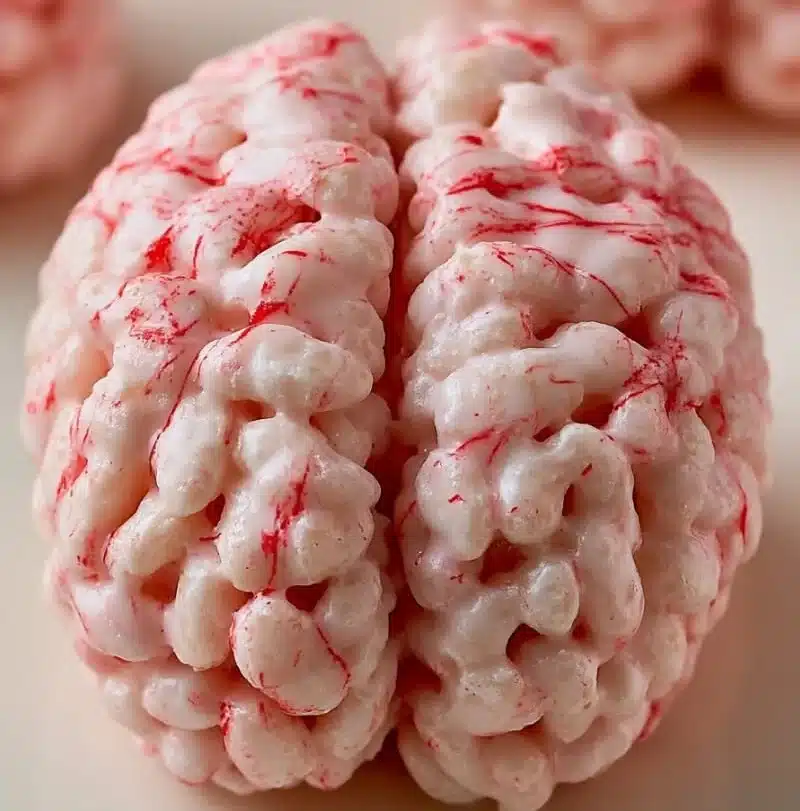
- To shape the mixture, press it into a brain-shaped mold. If you don’t have a mold, you can shape it by hand into a brain form.
- If you want to add some special details, melt some chocolate wafers. Use them to create red veins on your brain-shaped treat for a spooky look.
- Let the treats cool completely. Once cooled, carefully remove from the mold and they are ready to serve!
Why You’ll Love This Homemade Marshmallow Brain Rice Krispies
These brain-shaped Rice Krispies treats are not only adorable but also delicious! The combination of gooey marshmallows and crispy cereal is always a hit with kids and adults alike. They are perfect for parties, and the red color adds just the right amount of spookiness.
Nutritional Benefits
While these treats are not a health food, they do have some fun elements. Marshmallows give you quick energy, and Rice Krispies add some crunch. It’s great to enjoy them in moderation, especially during festive times!
What to Serve With Homemade Marshmallow Brain Rice Krispies
These treats are great by themselves, but they can also be served with:
- Chocolate dip for extra sweetness
- Ice cream on the side
- Other Halloween-themed snacks for a fun dessert table
- Bright colored candies for extra decoration
How to Store Homemade Marshmallow Brain Rice Krispies
To keep your homemade marshmallow brain Rice Krispies fresh:
- Store them in an airtight container at room temperature.
- They can last for up to a week, but they are best enjoyed within a few days.
- Keep them away from heat and moisture to maintain their crispy texture.
Tips and Mistakes to Avoid
- Don’t let the butter burn; you want it just melted.
- Make sure you mix the cereal in quickly while the mixture is still warm for best results.
- If using a mold, lightly grease it with butter or cooking spray to make removal easier.
- Be careful not to add too many drops of food coloring as it can change the taste.
Variation
If you want to change things up, try these fun variations:
- Use different colors of food coloring for different themes.
- Add some mini chocolate chips to the mixture for added texture.
- Incorporate peanut butter into the melted marshmallows for a nutty flavor.
FAQs
Can I use a different type of cereal?
Yes! You can substitute with any crispy cereal you like, such as Corn Flakes or Fruity Pebbles, to give your treats a unique taste and appearance.
Can I make these treats ahead of time?
Absolutely! These treats can be made a few days in advance. Just make sure to store them properly in an airtight container.
What if my molds don’t release the treats?
If the Rice Krispies treats stick to your mold, try gently running a butter knife around the edges. If needed, placing them in the fridge for a short while can help them to set more firmly.
Marshmallow Brain Rice Krispies
Ingredients
Main Ingredients
- 3 tablespoons butter Make sure to keep stirring to avoid burning.
- 1 package (10 oz) marshmallows These create the base of the treats.
- 6 cups Rice Krispies cereal Make sure to coat fully in the marshmallow mixture.
- Red food coloring Add a few drops for coloring, be careful not to change the taste.
- Chocolate melting wafers Optional for adding veins details.
Instructions
Preparation
- In a large pot, melt the butter over low heat, stirring continuously.
- Once melted, add the marshmallows and stir until completely melted and smooth.
- Remove from heat and add a few drops of red food coloring, stirring until evenly colored.
- Quickly add the Rice Krispies cereal and mix until fully coated.
- Press the mixture into a brain-shaped mold or shape by hand.
- If desired, melt chocolate wafers and use them to create red veins on the shaped treats.
- Let the treats cool completely, then carefully remove from the mold.