
How to make Cream Cheese Delight
Ingredients:
- 8 oz cream cheese, softened
- 1 cup powdered sugar
- 1 teaspoon vanilla extract
- 2 cups whipped cream
- Optional: Fresh fruits or chocolate syrup for topping
Directions:
- In a large bowl, mix the softened cream cheese with the powdered sugar and vanilla extract until smooth.
- Gently fold in the whipped cream, making sure to keep it light and fluffy.
- Transfer the mixture into a serving bowl or individual cups.
- Chill in the refrigerator for at least one hour.
- Top with fresh fruit or drizzle with chocolate syrup before serving.
Why You’ll Love This Cream Cheese Delight
Cream cheese delight is a simple yet delicious way to satisfy your sweet tooth. The combination of creamy texture and sweet flavor makes it a favorite among both kids and adults. Plus, it’s incredibly versatile—you can serve it at dinner parties, family gatherings, or just as a treat after a long day.
Nutritional Benefits
Cream cheese is rich in calcium and can provide a good source of protein. When combined with whipped cream, it can be a light yet filling dessert. Adding fresh fruits not only enhances the flavor but also boosts vitamins and fiber content.
What to Serve With Cream Cheese Delight
Cream cheese delight pairs well with various snacks and dishes. Consider serving it alongside:
- Graham crackers
- Fruit slices (like apples or strawberries)
- Cake slices or brownies
- Coffee or tea
How to Store Cream Cheese Delight
Store any leftovers in an airtight container in the refrigerator. It will stay fresh for about 3-5 days. Make sure to cover the top to prevent it from absorbing odors from other foods.
Tips and Mistakes to Avoid
- Always make sure your cream cheese is softened before mixing; this prevents lumps from forming.
- Don’t overmix the whipped cream; fold it in gently to keep the fluffiness.
- Allow time for chilling; this enhances the flavors and texture.
Variations
- Berry Bliss: Add mixed berries into the cream cheese mixture for added flavor.
- Chocolate Indulgence: Stir in cocoa powder or melted chocolate for a richer taste.
- Nutty Surprise: Incorporate crushed nuts for some crunch and healthy fats.
FAQs
Q: Can I use low-fat cream cheese?
A: Yes! You can substitute low-fat cream cheese for a lighter version. The taste will still be delicious.
Q: How long can I keep leftovers?
A: Leftovers can be stored in the refrigerator for up to five days.
Q: Can I freeze cream cheese delight?
A: It’s best not to freeze this dessert, as the texture may change. It’s better enjoyed fresh.
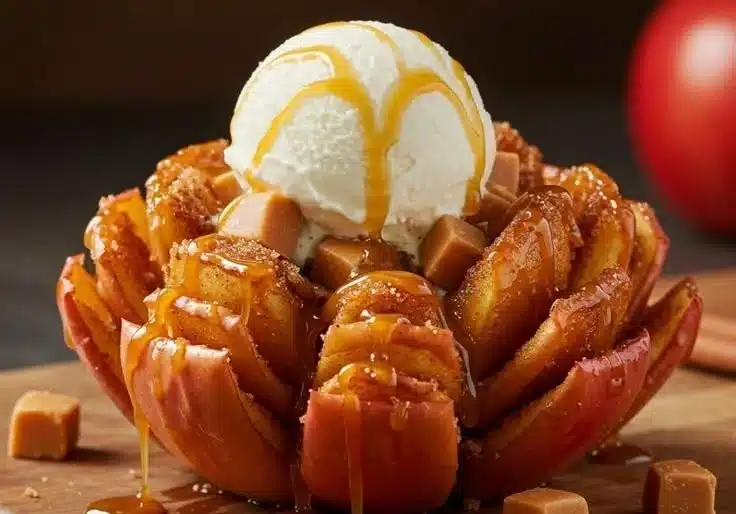
How to make Blooming Apples
Ingredients:
- 4 medium-sized apples
- 2 tbsp lemon juice
- 1/4 cup brown sugar
- 1/2 tsp cinnamon
- 1/4 cup walnuts, chopped (optional)
- 1/4 cup raisins (optional)
- 1 tbsp butter
Directions:
- Preheat your oven to 350°F (175°C).
- Core the apples and slice them thinly without cutting all the way through, so they stay intact.
- Place the apples in a baking dish and drizzle with lemon juice to prevent browning.
- Mix the brown sugar, cinnamon, walnuts, and raisins in a small bowl.
- Stuff the mixture into the sliced apples and place a small piece of butter on top of each one.
- Bake in the oven for about 25-30 minutes until the apples are tender and looking like they are blooming.
Why You’ll Love This Blooming Apples
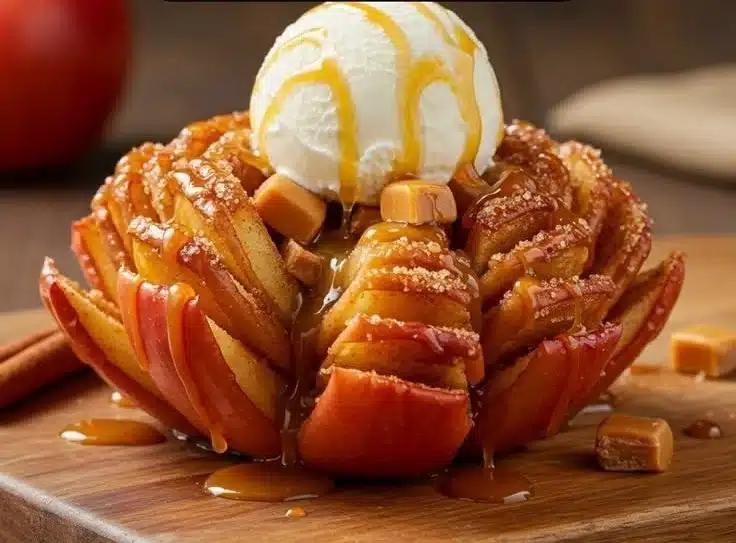
Blooming apples are visually stunning and make a charming centerpiece for any table, especially during holidays. The warm, comforting smells of baked apples with cinnamon will have everyone excited to dig in.
Nutritional Benefits
Apples are naturally high in fiber and vitamin C. When baked, they release more of their sweetness without high-calorie syrups or added sugars, making them a healthier dessert option.
What to Serve With Blooming Apples
Serve warm blooming apples with:
- Vanilla ice cream
- Whipped cream
- A drizzle of honey
- Caramel sauce
How to Store Blooming Apples
Store any leftovers in an airtight container in the refrigerator. They can last up to three days. Reheat in the microwave for a quick dessert.
Tips and Mistakes to Avoid
- Choose firm apples like Granny Smith or Honeycrisp; they hold their shape better during baking.
- Make sure to slice the apples carefully to avoid cutting all the way through.
- Don’t skip the lemon juice; it not only adds flavor but also helps keep the apples from browning.
Variations
- Stuffed with Cranberries: Replace raisins with dried cranberries for a tart twist.
- Nutty Crunch: Add more nuts or seeds to vary the flavor and add texture.
- Spiced: Sprinkle nutmeg or ginger along with the cinnamon for a more spiced flavor.
FAQs
Q: Can I use any type of apple for this recipe?
A: Yes, but firmer apples work best as they hold their shape during baking.
Q: Is this recipe suitable for kids?
A: Absolutely! It’s a healthy and fun treat that kids can help make.
Q: Can I make this ahead of time?
A: You can prepare the apples and stuff them ahead of time, then bake them just before serving.
How to make Baked Apples to Make a Flower
Ingredients:
- 4 large apples
- 1/4 cup sugar
- 1/2 tsp ground cinnamon
- 1/4 cup dried fruit (like apricots or cranberries)
- 1/4 cup nuts (like pecans or almonds)
- Butter for greasing
Directions:
- Preheat your oven to 375°F (190°C).
- Cut a small slice off the bottom of each apple to help them stand upright.
- Core the apples but never cut all the way through the bottom.
- In a bowl, mix the sugar, cinnamon, dried fruit, and nuts.
- Fill the core of each apple with the mixture.
- Place apples in a greased baking dish and bake for 30-35 minutes until tender.
Why You’ll Love This Baked Apples to Make a Flower
These charming baked apples make for a beautiful dessert presentation. They not only look good but offer a delicious and naturally sweet treat, perfect for impressing guests during gatherings or holidays.
Nutritional Benefits
Baked apples are a great source of dietary fiber and vitamins when made with whole, fresh ingredients. Using nuts and dried fruit adds healthy fats and natural sweetness.
What to Serve With Baked Apples to Make a Flower
Serve these lovely baked apples alongside:
- Yogurt
- Ice cream
- A drizzle of maple syrup
- Pancakes or waffles for breakfast
How to Store Baked Apples to Make a Flower
Store any leftovers in the refrigerator in an airtight container. They can typically last for about 3 days. When ready to enjoy again, simply reheat in the oven.
Tips and Mistakes to Avoid
- Ensure you properly core the apples to allow space for the filling.
- Watch the baking time; you want them soft but not mushy.
- You can brush the apples with honey or syrup for extra sweetness.
Variations
- Using Different Fruits: Try using pears instead of apples for a different flavor.
- Adding Spices: Add nutmeg, ginger, or vanilla to the filling for extra flavor.
- Chocolate Drizzle: After baking, add a drizzle of melted chocolate for a decadent touch.
FAQs
Q: Can I make these baked apples ahead of time?
A: Yes! You can prepare and fill the apples in advance, then bake them fresh when you’re ready to serve.
Q: Are these baked apples gluten-free?
A: Absolutely! This recipe does not include any gluten-containing ingredients.
Q: Can I substitute the nuts if I have allergies?
A: Yes! You can leave out the nuts or replace them with seeds or oats for added texture.
Enjoy your time in the kitchen experimenting with these delightful recipes!
Cream Cheese Delight
Ingredients
Main ingredients
- 8 oz cream cheese, softened Make sure it's softened to prevent lumps.
- 1 cup powdered sugar
- 1 teaspoon vanilla extract
- 2 cups whipped cream Fold gently to maintain fluffiness.
Toppings
- Fresh fruits or chocolate syrup Optional, for topping before serving.
Instructions
Preparation
- In a large bowl, mix the softened cream cheese with the powdered sugar and vanilla extract until smooth.
- Gently fold in the whipped cream, making sure to keep it light and fluffy.
- Transfer the mixture into a serving bowl or individual cups.
- Chill in the refrigerator for at least one hour.
- Top with fresh fruit or drizzle with chocolate syrup before serving.